This comprehensive guide will explain how to install stock firmware on any Samsung device using Odin. Samsung users have a great advantage for flashing Stock ROM; we have the Odin flash tool. This software has made the flashing process very easy.
This tool is specially designed for Samsung users. It is very much useful and lifesaver. By mistake, if you bricked your Samsung device or your device is not booting up, stuck in a boot loop, you can follow this guide to fix this issue.
Odin provides a spotless and easy-to-use interface. Anyone with little knowledge can use this tool with ease. I have tried to explain the complete process in straightforward steps. With the help of this tool, you can flash Firmware’s, Kernels, TWRP, and any other images.
If you want to replace your device stock recovery with TWRP to gain root privileges, you can easily do it with Odin software. Furthermore, you can manually flash the latest software update on your Samsung device.
Odin supports .tar or .tar.md5 firmware files format. If you have these formant files, you can easily flash it via Odin. This software is only available for Windows. To flash files on your Samsung Galaxy device, you need to reboot your Samsung device into Download mode and connect it to a PC/Laptop. You can download it from this link.
Page Contents
What is a Stock Firmware?
Stock ROM is simply an operating system officially developed by manufacturers like Google. Excepting them, all others are Custom firmware. In simple words, we can state that Stock Firmwres are the official ones by manufacturers that are stable, performative, and attractive. It comes with limited customizations and functionalizations. So, if you’re a customization lover, then this firmware isn’t created for you.
Process-wise, Stock Firmware is the default OS in Android Smartphones and replaced by various brands like MI and OnePlus for making devices more creative and providing them with a customizable UI. But still, Stock Firmware is more convenient and developed for the long run.
Advantages of Stock Firmware
- Stock Firmware is developed by the official manufacturers, and that’s why it’s more secure than third-party Custom ROMs.
- It has superior stability and performance than the Custom ones.
- Stock Firmware doesn’t void the device’s warranty.
- It offers regular updates for every application available inside it.
- Stock ROM consumes a lesser battery than Custom ROMs.
- It’s developed with immense pre-installed system applications which are all useful and secure.
- There are no bugs in the Stock Firmware.
Preparations
- Make sure to charge your device or at least 60% charged fully.
- You need a Windows PC/Laptop to run the tool.
- Take Nandroid backup using TWRP.
- Install Samsung USB Drivers for your device.
- You can also set up ADB Drivers on your computer.
- Download the latest Odin Flash Tool.
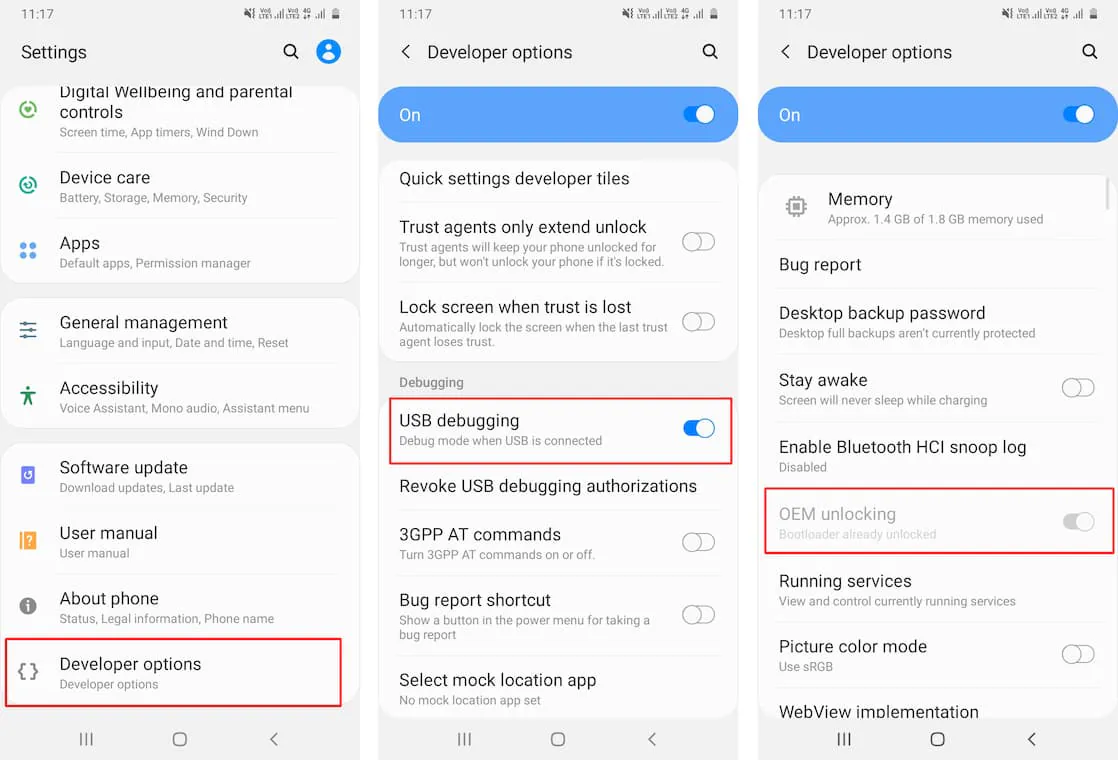
- Enable USB Debugging, OEM Unlocking, and Developer option.
- To do this, go to Settings → About → Software Information → More.
- Tap on Build Number 7-8 times until you see a message “Developer option enabled.”
- Now go back to Settings → Developer Options → Enable USB Debugging as well as OEM unlocking.
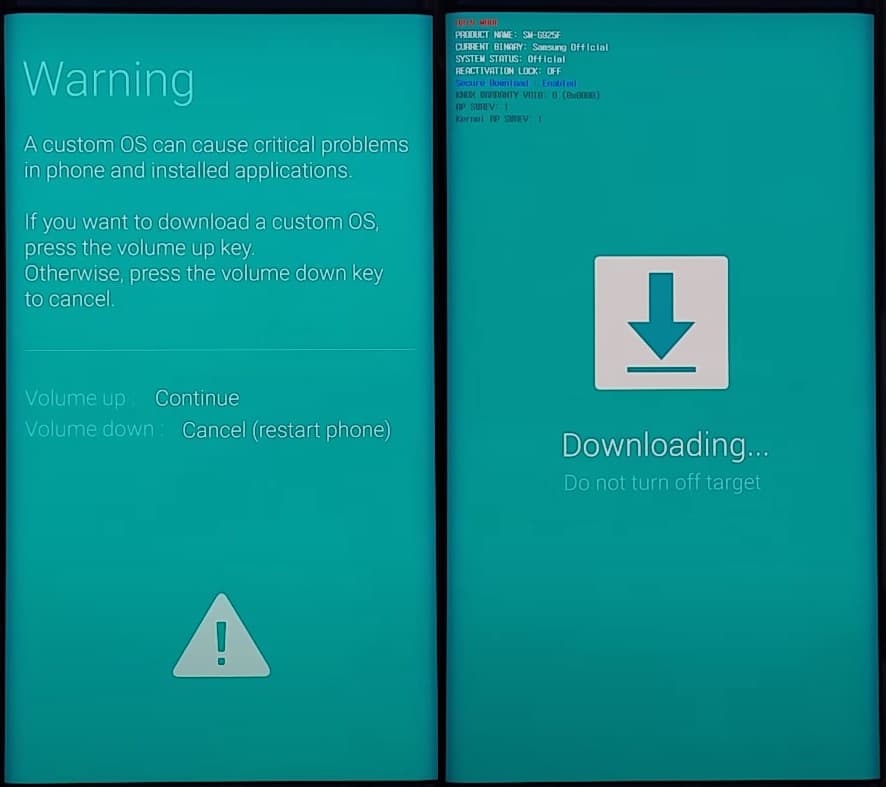
- Boot Samsung Galaxy A51 into Download Mode.
- Turn off your device.
- You can do so by holding the Volume Down + Volume Up + Power keys simultaneously for a few seconds.
- Release the keys when you get a screen with an exclamation sign.
- Press the Volume Up button to enter the Download Mode.
Download Stock Firmware
- Samsung Firmware Downloader Tool
- Samsung Firmware Downloader Site:
Steps to Install Samsung Stock Firmware using Odin?
- Download Samsung stock firmware .zip file for your device.
- Extract the downloaded firmware zip file.
- The extracted firmware files should be in “.tar” or “.tar.md5” format.
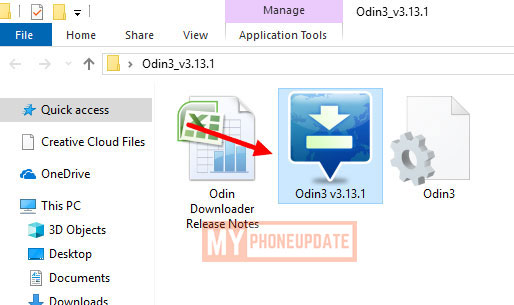
- Now download and extract the Odin ZIP on your PC.
- Open the extracted folder and run the Odin.exe file.
- Connect the Samsung Galaxy device to the PC while it is in Download Mode.
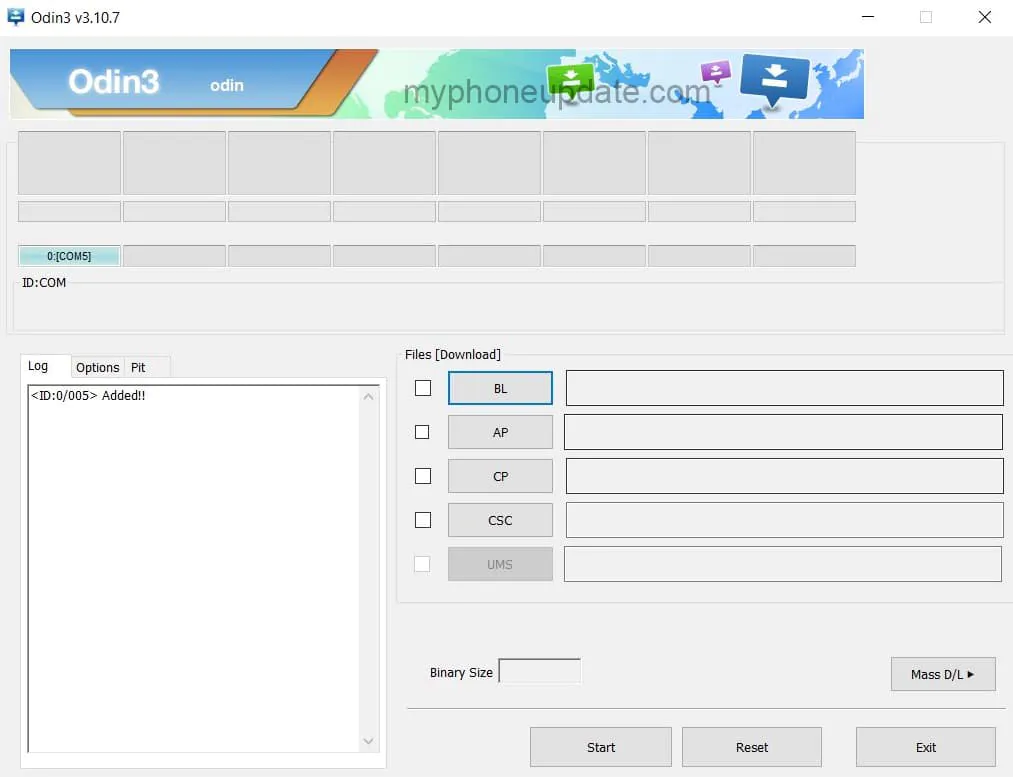
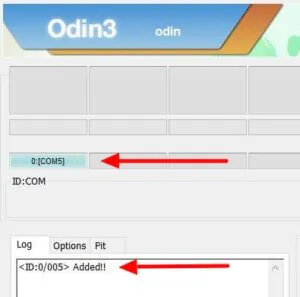
- After attaching the USB cable, you will see a blue sign in the Odin tool interface. It means your phone is connected successfully.
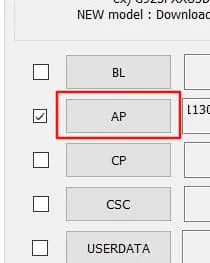
- Add the Recovery TWRP .tar file from that you have already downloaded.
- Click on the AP button and select TWRP. (In case you downloaded multi-file firmware with AP, BL, CP, and CSC, you must add the firmware components to corresponding slots in Odin like shown below.)
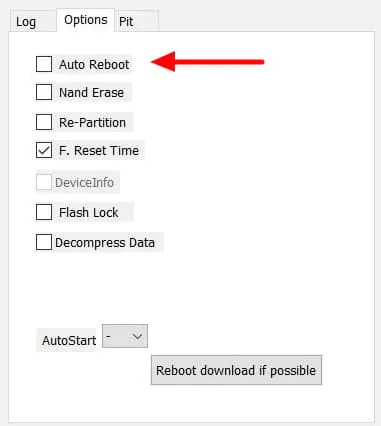
- Go to the Options tab and Uncheck the Auto Reboot option.
- Now, tap on the Start button to root your device.
- The flashing process will take a few minutes, so be patient. Once done, you will see PASS on the top of Odin.

- All Done! You have successfully installed Stock ROM on your Samsung Galaxy device.
If you see, FAIL! Message on the Odin tool, then remove the battery if your device supports it or has a non-removable device, restart Odin software, and download a different version. Once you have downloaded a new version, repeat the above process once again. You also diagnose the issue by a simple google search with the error.
Wrapping Up –
This was all about Flashing firmware on Samsung devices using Odin. The method was straightforward, right! I have tried my best to explain to you as clear as possible. Also attached the screenshots of the steps for a better understanding of the method. We also discussed the possible errors that you may face during the flashing process.
I hope you find this guide helpful. Leave your happenings and issues with the steps in the comment section below.