In this guide, I will show you how to install TWRP Recovery on Samsung Galaxy S9 Plus with easy steps. If you want to root your phone, then the first thing you need is TWRP recovery.
When it comes to flashing files on android, TWRP stands out first. The reason is simple; it’s because of its simplicity, broad support, and easy-to-use UI. Also, it supports almost every android device out there. The availability of the recovery file totally depends on development.
With the help of this guide you can install TWRP Recovery on Galaxy S9 as well as Galaxy S9 Plus smartphone. So, don’t be confused.
If you want to flash Custom ROM, Modules, Zip files on Galaxy S9 Plus, you must use TWRP recovery. But you must keep in mind that while performing the steps if you miss out, anything can brick your device.

First, read the complete guide, and after getting all the information, you can proceed with the steps. This will avoid any confusion while installing the TWRP on Galaxy S9 Plus.
In this guide, I have shown you a step-by-step process for installing TWRP recovery on Galaxy S9 Plus.
Page Contents
About Samsung Galaxy S9 Plus
The Galaxy S9 Plus is the newly launched smartphone. It has some great features. Here is some Key Specification of Galaxy S9 Plus:
- This phone comes with a 6.2 Inches Full HD+ 1440 x 2960 pixels Super AMOLED Display.
- Galaxy S9 Plus is powered by the Snapdragon 845, which is an Octa-Core CPU.
- It has 6 GB of RAM and 256 GB of Internal Storage.
- Moving to the OS, this device runs on One UI on top of Android 10 (Q) upgradable.
- Camera – It has a Dual Rear-facing Camera of 12 MP + 12 MP and 8 MP + 2 MP Dual Selfie camera.
- Sensors – This phone supports Iris scanner, fingerprint (rear-mounted), accelerometer, gyro, proximity, compass, barometer, heart rate, SpO2 sensors.
- Moving to the battery, it has a Non-removable Li-Ion 3500 mAh battery.
// Source: GSMArena
What is TWRP Recovery?
TWRP stands for (Team Win Recovery Project). It is the best custom recovery for android. It helps us to perform useful tasks such as flash mods zip files, flash SuperSU, and more.
We can’t do such types of tasks without TWRP recovery. You can do many things directly from your device itself without the need to connect it with the computer.
As we all know, our phone has a Stock Recovery, which is installed by default. But through Stock Recovery, we can’t do many things. But if we installed Custom Recovery like TWRP Recovery, then we have many things to play around with on our phone.
Advantages Of Installing TWRP Recovery
- You can Root Android without a PC.
- Easily install Custom ROM without PC.
- Support for Nandroid Full Backup.
- It also helps to unbrick smartphones.
- Flash zip files, Mods without PC.
- Allows removing all the bloatware.
- Update your device to a newer version of Android.
Disadvantages Of Installing TWRP Recovery
- Phone warranty will be lost.
- Flashing the wrong file can Brick your device.
- You won’t be able to receive OTA Update manually.
- An unstable version of TWRP can Brick your Phone.
Prerequisites –
- Make sure that the Galaxy S9 Plus bootloader is unlocked.
- Download and Install the latest Samsung USB Drivers on your PC.
- Use an original USB that comes along with your phone.
- A PC or Laptop to run ADB commands.
- Charge your phone, a minimum of 75% battery.
- Enable USB Debugging, OEM Unlocking, and Developer option.
- To do this, go to Settings → About → Software Information → More.
- Tap on Build Number 7-8 times until you see a message “Developer option enabled.”
- Now go back to Settings → Developer Options → Enable USB Debugging as well as OEM unlocking.
- It would be best if you disabled all your Security Locks.
- This guide is only for Samsung Galaxy S9 Plus. Please do not try these steps on any other smartphone.
Downloads
Make sure to download TWRP recovery according to your device model.
- Download TWRP Recovery for Galaxy S9/ S9 Plus.
- Disable-Dm-Verity-ForceEncrypt.zip
- Download Odin flash tool.
Steps to Install TWRP Recovery On Galaxy S9 Plus
I assume that you have followed the pre-requirements section. Now you are ready to flash TWRP Recovery on your Samsung phones.
Step 1: Boot Samsung Galaxy S9 Plus into Download Mode.
- Turn off your device.
- You can do so by holding the Volume Down + Volume Up + Power keys simultaneously for a few seconds.
- Release the keys when you get a screen with an exclamation sign.
- Press the Volume Up button to enter the Download Mode.
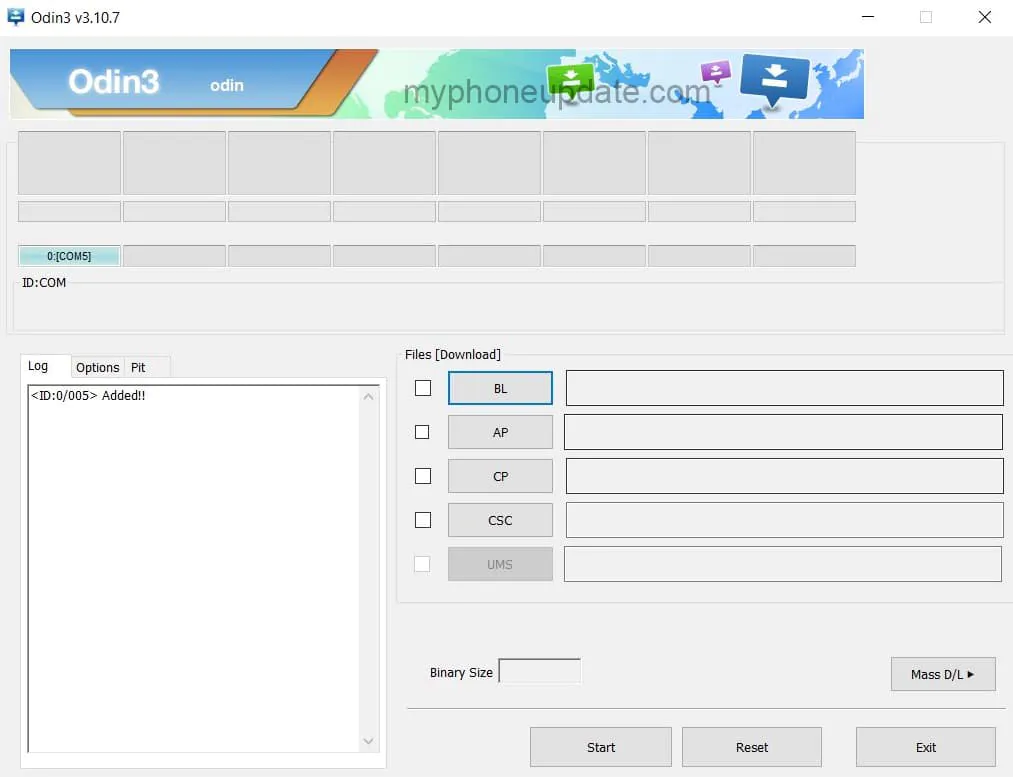
Step 2: Download the Odin flash tool, extract the zip file, and run the Odin.exe file.
Step 3: Install TWRP Recovery using ODIN.
- Connect your Samsung device to your PC/Laptop.
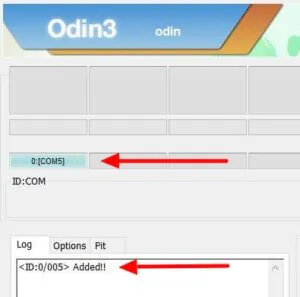
- After attaching the USB cable, you will see a blue sign in the Odin tool interface. It means your phone is connected successfully.
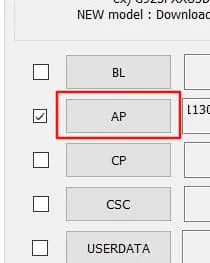
- Add the Recovery TWRP .tar file from that you have already downloaded.
- Click on the AP button and select TWRP.
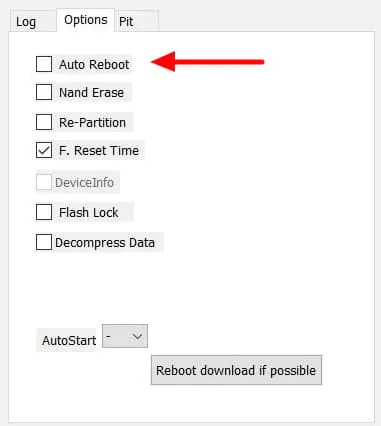
- Go to the Options tab and Uncheck the Auto Reboot option.
- Now, tap on the Start button to root your device.
- The flashing process will take a few minutes, so be patient. Once done, you will see PASS on the top of Odin.

Step 4: Disconnect your Galaxy S9 Plus smartphone.
Step 5: Boot your device into TWRP Recovery mode.
- Turn Off your phone.
- Press and hold the Volume Up + Power button; as soon as you see the boot screen, release the Power button (do not release the volume up key until you boot into TWRP mode.)
- Otherwise, you can also use the ADB command to boot into recovery mode.
- Connect your phone to PC/Laptop
- Open the command prompt on your PC and type the following command.
adb reboot recovery
-
- This will boot Galaxy S9 Plus into recovery mode.
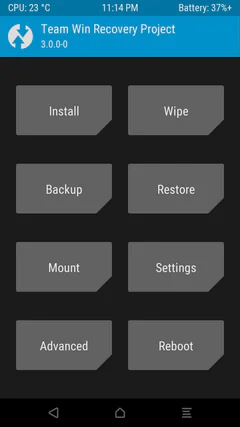
Step 6: Disable encryption on Samsung Galaxy S9 and Galaxy S9 Plus.
- Go to the “Wipe” menu in TWRP and tap on “Format Data”.
- Enter ‘Yes’ in the provided field to completely format the data partition (including internal storage).
- Once done, go to the “Reboot” menu in TWRP and press the ‘Recovery’ button to reboot your phone into TWRP. This will ensure that TWRP can decrypt the storage.
- When the phone boots back into TWRP, headover to “Mount” menu.
- Now select “Enable MTP” and connect the Galaxy S9/S9 Plus to the PC/Laptop using the USB cable.
- Download DM-Verity disabler file from the “Downloads” section above.
- Transfer the files to the phone’s internal storage and then disconnect the phone from the PC.
- Go to the “Install” menu in TWRP and select the Encryption Disabler zip file (e.g. Disable-Dm-Verity-ForceEncrypt.zip).
- Finally, Swipe to confirm flash.
Step 7: Congrats! You have successfully flashed the TWRP on Galaxy S9 Plus.
Now that you have successfully flashed the recovery file, you can now proceed to Root Galaxy S9 Plus using Magisk. The method is very simple and straightforward. You have to flash a zip file, and your phone will get root access safely.
Conclusion –
This is all about how you can install TWRP recovery on Galaxy S9 Plus. In this method, we have used the Odin flash tool to flash the recovery file. Whenever you want to flash files, you can boot into recovery mode by pressing the keys’ combination.
And then you can easily flash files to your phone without the need for a PC/Laptop. Not only will you be able to flash files, but you can do a hell of a lot of things with the help of TWRP recovery.
I hope this guide helps you to install TWRP on your device. If you find this guide helpful, then make sure to share it with Galaxy S9 Plus users. If you encounter any errors while applying the steps, then make sure to discuss your problems in the comments.