Page Contents
How To Unroot Redmi 9A
Hey, there today in this article I will be showing you How To Unroot Redmi 9A with very simple steps. In the previous article, I have shown you the procedure on How To Root Redmi 9A. Now if you want to Unroot then follow this guide till the end.
Once you unroot your device you can easily claim your warranty with no issue. I have shown you various methods to root your phone but the way that you have rooted your phone using the app or through pc only that method you have to follow to Unroot your device.
About Redmi 9A
This Redmi 9A is the newly launched device by Xiaomi. It has some great features, Here is some Key Specification of Redmi 9A:
- This phone comes with a 6.22 Inches Full HD+ 1080 × 2340 Pixels IPS LCD Display.
- Redmi 9A is powered by the MediaTek Helio G70 which is an Octa-Core CPU.
- It has 3 GB of RAM and 64 GB of Internal Storage.
- Moving to the OS this device runs on Android 10.0 (Q) MIUI 11.
- Camera – It has a Rear-Facing Camera of 13 MP and the Front-Facing is an 8 MP shooter.
- Moving to the battery it has a Non-removable Li-Po 5000 mAh battery.
Why To Unroot?
Unrooting your device simply means that remove root access from your phone. But many times what happens is your phone ran into various problems and if you failed to fix that then you must unroot your phone. Your phone will revert back to previous and you will not face any problems.
Related Article: Unlock Bootloader On Redmi 9A
Benefits Of Unrooting Your Android Device
Now once you Unroot you can claim warranty without any problem. Your Redmi 9A will become safe as you have removed all the super permissions.
Also, you will not face any issue while running your apps and games. The steps are quite simple just follow the guide shown below.
Related Article: Install Custom ROM On Redmi 9A
How To Unroot Redmi 9A With SuperSU: Method 1
- First Off Download Supersu App On Your Redmi 9A
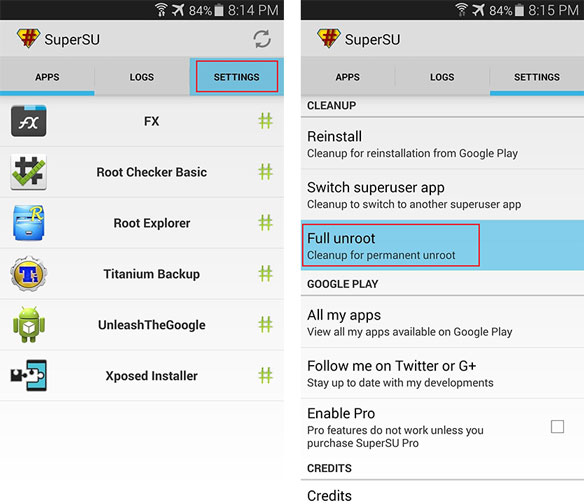
- On Settings Page Tap On Full Unroot
- Now The Unroot Process Will Start And Your Phone Will Reboot
- That’s It 🙂 You Have Successfully Unroot Your Smartphone
Unroot Redmi 9A With Single Click Method: Method 3
- First Download Kingo Root App And Install It
- Now Open Kingo Root Apps And Go To Settings
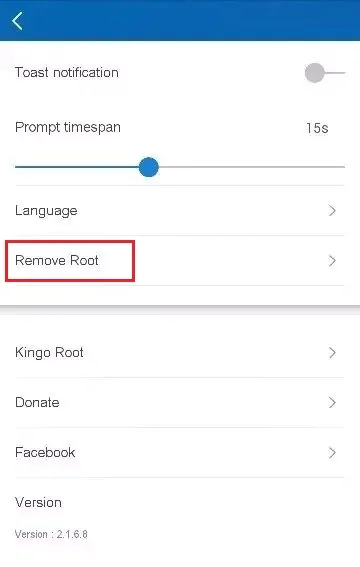
- Now Tap On Remove Root Option
- Let The Process Complete Successfully! Sit Back Relax
- That’s It 🙂 You Have Successfully Unroot Your Phone
How To Unroot Redmi 9A Using PC: Method 4
- First Off Download KingoRoot Software On Your PC/ Laptop & Install It.
- Connect Redmi 9A To PC Via USB Cable
- Now Open Kingo Root Software >> After That Connect Your Phone.
- Once Your Device Is Recognized. Tap On Remove Root Option
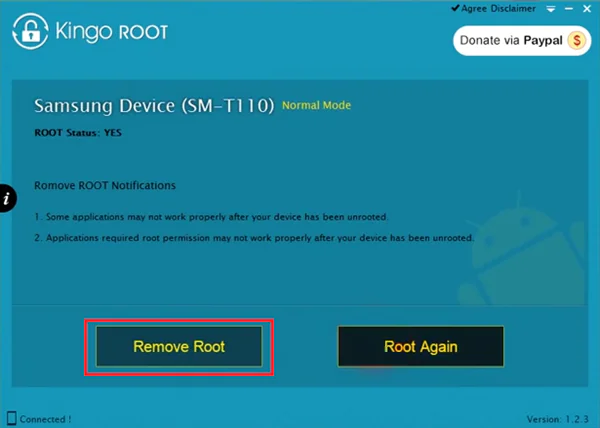
- Once UnRooting Process Is Finished. Your Phone Will Automatically Reboot.
- That’s It 🙂 You Have Successfully Unroot Your Device
How To Unroot Redmi 9A: Method 5
- Download KingRoot App And Install It
- Open KingRoot App >> At The Top Right Corner Tap On “Three Dots”
- Go To “General Setting” >> On Settings Page >> Tap On “Uninstall KingRoot”
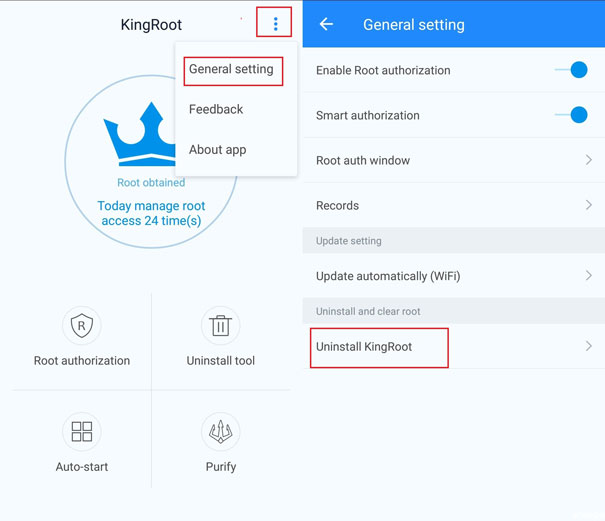
- Once UnRooting Process Is Finished. Redmi 9A Will Automatically Reboot
- That’s It 🙂 You Have Successfully Unroot Your Device
Related Article: Install TWRP Recovery On Redmi 9A
Final Words: So, this is all about How To Unroot Redmi 9A. If you want to ask any questions related to this article then make sure to comment down below. We would love to hear from you!