Page Contents
- 1 Install TWRP Recovery On Motorola One Fusion Plus
- 2 About Motorola One Fusion Plus
- 3 What is TWRP Recovery?
- 4 Install TWRP Recovery On Motorola One Fusion Plus: Method 1
- 5 Install TWRP Recovery On Motorola One Fusion Plus Using TWRP App: Method 2
- 6 How To Install TWRP Recovery On Motorola One Fusion Plus Without PC: Method 3
Install TWRP Recovery On Motorola One Fusion Plus
In this article, I have shown you the method to Install TWRP Recovery On Motorola One Fusion Plus. I have shown you three different methods to Install TWRP Recovery. Once you install TWRP Recovery you have lots of options to play around.
About Motorola One Fusion Plus

This Motorola One Fusion Plus is the newly launched device by Motorola. It has some great features, Here is some Key Specification of Motorola One Fusion Plus:
- This phone comes with a 6.5 Inches 1080 x 2340 pixels HD+ Display.
- Motorola One Fusion Plus is powered by Snapdragon 730 chipset which is an Octa-Core CPU.
- It has 6 GB of RAM and 128 GB of Internal Storage.
- Moving to the OS this device runs on Android 10.
- Camera – It has a Quad Rear-Facing Camera of 64 MP + 8 MP + 5 MP + 2 MP and the Front-Facing is a 16 MP shooter.
- Moving to the battery it has a Non-removable Li-Po 5000 mAh battery.
What is TWRP Recovery?
As we all know the one which our phone has is a Stock Recovery which is installed by default. But through Stock Recovery, we can’t do many things. But if we installed Custom Recovery then we have many things to play around with our phone. Custom Recovery helps us to perform lots of tasks such as flash mods zip files, flash SuperSU, and more. Without custom recovery, we can’t do such type of task in our Android devices.
Advantages Of Installing TWRP Recovery
- Update Your Phone To A Newer Version Of Android
- Easily Install Custom ROM On Motorola One Fusion Plus Without PC
- You Can Root Motorola One Fusion Plus Without PC
- Flash Zip Files, Mods Without PC
Disadvantages Of Installing TWRP Recovery
- Your Phone Warranty Will Be Lost After Installing TWRP Recovery
- Flashing The Wrong File Can Brick Your Phone
- You Won’t Be Able To Install OTA Update Manually
- Unstable Version Of Custom ROM Can Brick Your Phone
Install TWRP Recovery On Motorola One Fusion Plus: Method 1
Make Sure To First Unlock Bootloader On Motorola One Fusion Plus Before Proceeding To Install Custom Recovery On Your Phone!
1.) First off Enable USB Debugging On Motorola One Fusion Plus
- Go To Settings >> System >> About Phone >> Tap On Build Number 6-7 Times
- Now Go Back >> Advanced Settings >> Developer Options >> Enable “USB Debugging”
2.) Now You Have To Setup ADB And Fastboot On Windows PC This Is Very Important Step
3.) After That Download TWRP Recovery File On Your PC And Renamed The Downloaded Recovery File Name To twrp.img.
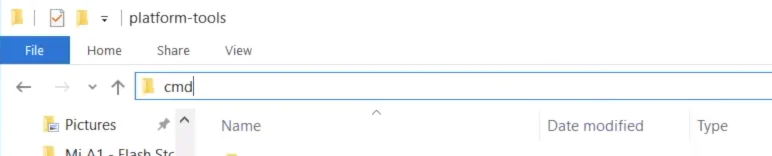
4.) Once The Files Are Downloaded Go-To Platform Tools Folder >> Type “cmd” In The Address Bar & Press Enter To Open Command Prompt
5.) Connect Your Phone To PC/Laptop >> And Type The Following Command
adb devices
Once you write this command you must see your device (Random String). If not then you have not installed the drivers properly. So, install it properly and try again.
7.) Next Type The Following Command To Boot Your Phone Into Fastboot Mode
fastboot reboot bootloader
6.) Now Type The Following Command To Install TWRP Recovery
fastboot flash twrp.img
The flashing process with start so, wait till the flashing process completes
7.) Now type the following command to Reboot Your Phone
fastboot reboot
8.) That’s It 🙂 You Have Successfully Install TWRP Recovery On Your Motorola One Fusion Plus
Install TWRP Recovery On Motorola One Fusion Plus Using TWRP App: Method 2
1.) First Off Open Play Store Search For “TWRP” & Install It.
2.) After That Open TWRP App & Enable Root Access
3.) Tap On TWRP Flash >> After That It Will Ask You To Allow Root Access Just Allow It
4.) Now You Have to Search Your Device & Select It
5.) After That You Will See The List Of TWRP Image Version >> Select Latest Version Of TWRP Image & Download It On Phone Internal Storage
6.) Once Download Is Completed Go Back >> Again Tap On TWRP Flash >> Now Tap On “Select a file to flash” >> Now Locate The TWRP Image File That You Just Downloaded >> Select It & Tap On Flash To Recovery
7.) It Will Take Some Seconds To Complete The Flashing Process
8.) That’s It 🙂 You Have Successfully Install TWRP Recovery On Your Motorola One Fusion Plus
How To Install TWRP Recovery On Motorola One Fusion Plus Without PC: Method 3
1.) First Off Open Play Store Search For “Flashify” & Install It.
2.) Open Flashify App >> Next Allow Root Access
3.) Now Tap On Backup/Restore >> After That Tap On Backup Current Recovery >> Select Location >> And Then Tap On Back It Up
4.) Go To Flash >> Tap On Recovery Image >> Now Tap On Download TWRP >> After That Select Latest Version Of TWRP
5.) After That Tap On Reboot Now
6.) That’s It 🙂 You Have Successfully Install TWRP Recovery On Your Motorola One Fusion Plus
Related Article: How To Unroot Motorola One Fusion Plus
Final Words: So, this is all about How To Install TWRP Recovery On Motorola One Fusion Plus, I have shown you three easy methods to Install TWRP Recovery. Make sure to comment down below which method works for you. We would love to hear from you!